How to Assign a Static IP Address in Windows
Most users do not need to set a static IP address in Windows, but advanced users and businesses might benefit from a static IP address. A static IP address is useful for hosting servers or websites and for sharing large files or if you are planning on using forwarding ports.
When you setup port forwarding your router forwards ports to the IP address you specify. If you don’t setup a static IP address the port forward will work the first time. But after restarting your computer it may use a different IP address.
What is an IP Address
IP addresses are four sets of numbers that are separated by periods that allow computers to identify each other. Every computer on your network has at least one ip address. Two computers on the same network should never have the same IP Address. If two computers end up with the same IP address neither will be able to connect to the Internet.
For more information about static and dynamic IP addresses check out our post What is an IP address?
Setting up a Static IP Address
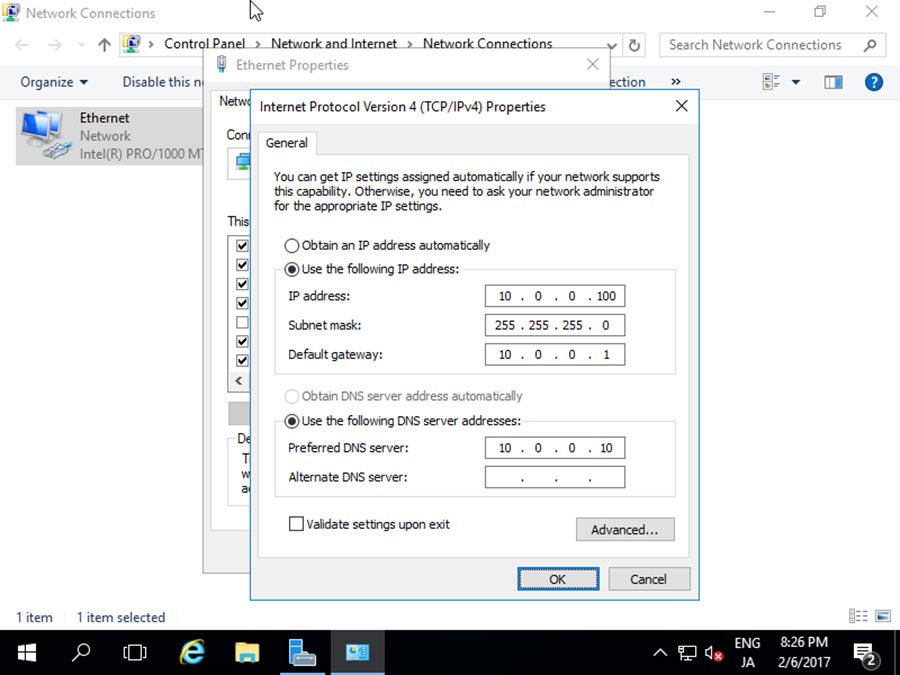
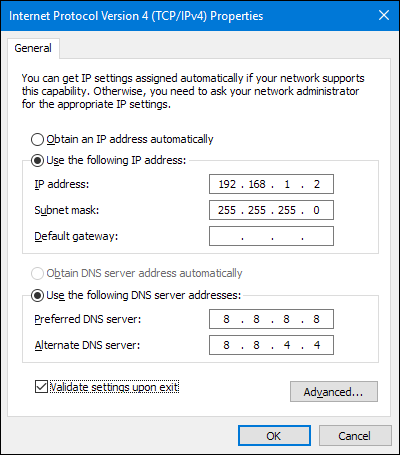
You can manually assign IP addresses to your computers and devices.A static IP address must be manually entered into a device, along with router address, subnet mask, DNS server addresses and domain information.
To set a static IP address in Windows 7, 8, and 10:
- Click Start Menu > Control Panel > Network and Sharing Center or Network and Internet > Network and Sharing Center.
- Click Change adapter settings.
- Right-click on Wi-Fi or Local Area Connection.
- Click Properties.
- Select Internet Protocol Version 4 (TCP/IPv4).
- Click Properties.
- Select Use the following IP address.
- Enter the IP address, Subnet mask, Default gateway, and DNS server.
- Click OK.
Your computer displays a static IP address.
You can also watch this video explaining how to set your static IP address:
You can follow the official Microsoft guide here
If you need help configuring a static IP address on Windows, you are welcome to reach out to us.